

How To Get Rid Of Hard Edges In Photoshop
This step-past-stride guide explains how to smooth the edges of an image using Photoshop CC. Photoshop is a powerful photo editing program with seemingly endless tools and techniques to learn. If you're a beginner, it can be overwhelming! If yous're using Photoshop to create composites — combining objects from two or more images — the tricks y'all'll learn in this guide will help you lot apace improve your skills.
Tabular array of contents
- Why and when would you need to smooth edges in Photoshop?
- Different methods to smoothen edges in Photoshop
- Creating a vignette
- Step 1: Define the area
- Step 2: Feather the edges
- Pace 3: Inverse the selection
- Step 4: Add an adjustment layer
- Footstep 5: Accommodate layer blending mode
- Smoothing edges of isolated objects in Photoshop
- Techniques for making your selection
- Step 1: Select and Mask
- Stride 2: Apply the Refine Edge Brush Tool (optional)
- Summary

Why and when would you demand to smooth edges in Photoshop?
There are a few different reasons why yous might desire to smooth, soften, or blur the edges of an epitome. Here are a few reasons:
- To create a vignette;
- When creating a composite image to make it look more realistic;
- If you remove and replace the background;
- When you desire the edge to fade or dissolve to transparent.
Different methods to smooth edges in Photoshop
If you've spent any corporeality of fourth dimension working in Photoshop, you've probably noticed that there are many different ways to achieve the same upshot. Ask five dissimilar graphic artists or photograph editors how to do something in the program, and yous're probable to get five different responses — and none of them will exist incorrect!
In this guide, I'g going to bear witness you two different means to mistiness the edges of your paradigm in photoshop. The first method is how to soften, or feather the border of an epitome to create a vignette. The 2nd is smoothing the edge of an isolated epitome. This method is helpful if you were removing and replacing the background or creating a blended epitome.
Creating a vignette
A vignette, or intentional blur effectually the edge of a photo, is a great way to focus attention on the subject of your image. Vignettes can exist any color, black, white, or even transparent. Hither'south how to plume the edges of an image using Photoshop to create a vignette:
Step one: Define the area
Use the Elliptical Marquee Tool (M), found in your toolbar, to draw the shape you want within the vignette.
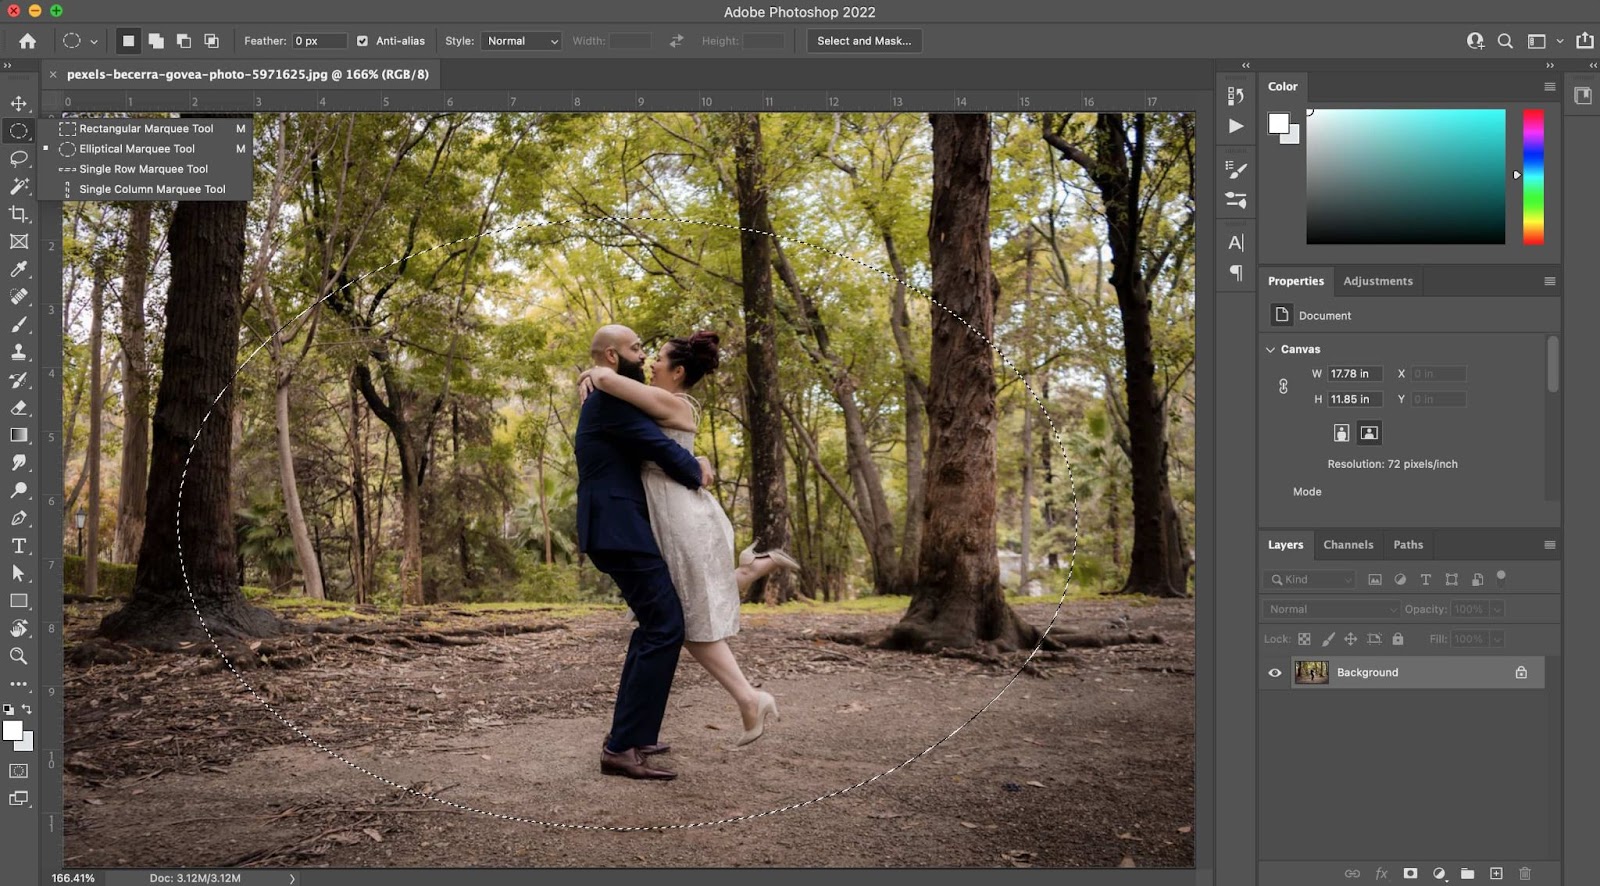
Now, this choice volition have a hard edge, then next, yous will need to make the option softer — or feather the choice.
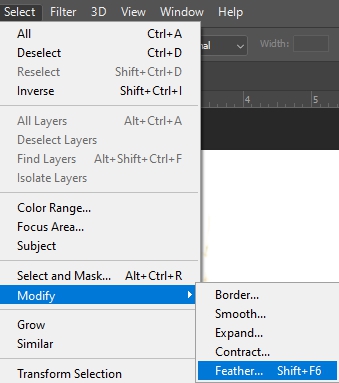
Step 2: Feather the edges
To feather the edges of your selection, become to Select > Alter > Feather. A "Feather Option" dialogue box will pop up, asking you lot to enter a Plumage Radius. The amount you enter will depend on the size of your image. I entered a radius of 40 pixels.
Don't exist afraid to play around with this effigy till y'all reach your desired upshot. To preview what your blurred edges will look similar after you set your feather radius, press "Q" to edit in mask mode. The red mask that appears will give you an idea of what your blur will look like. If yous're happy with it, press "Q" again before yous motility on to Step iii.
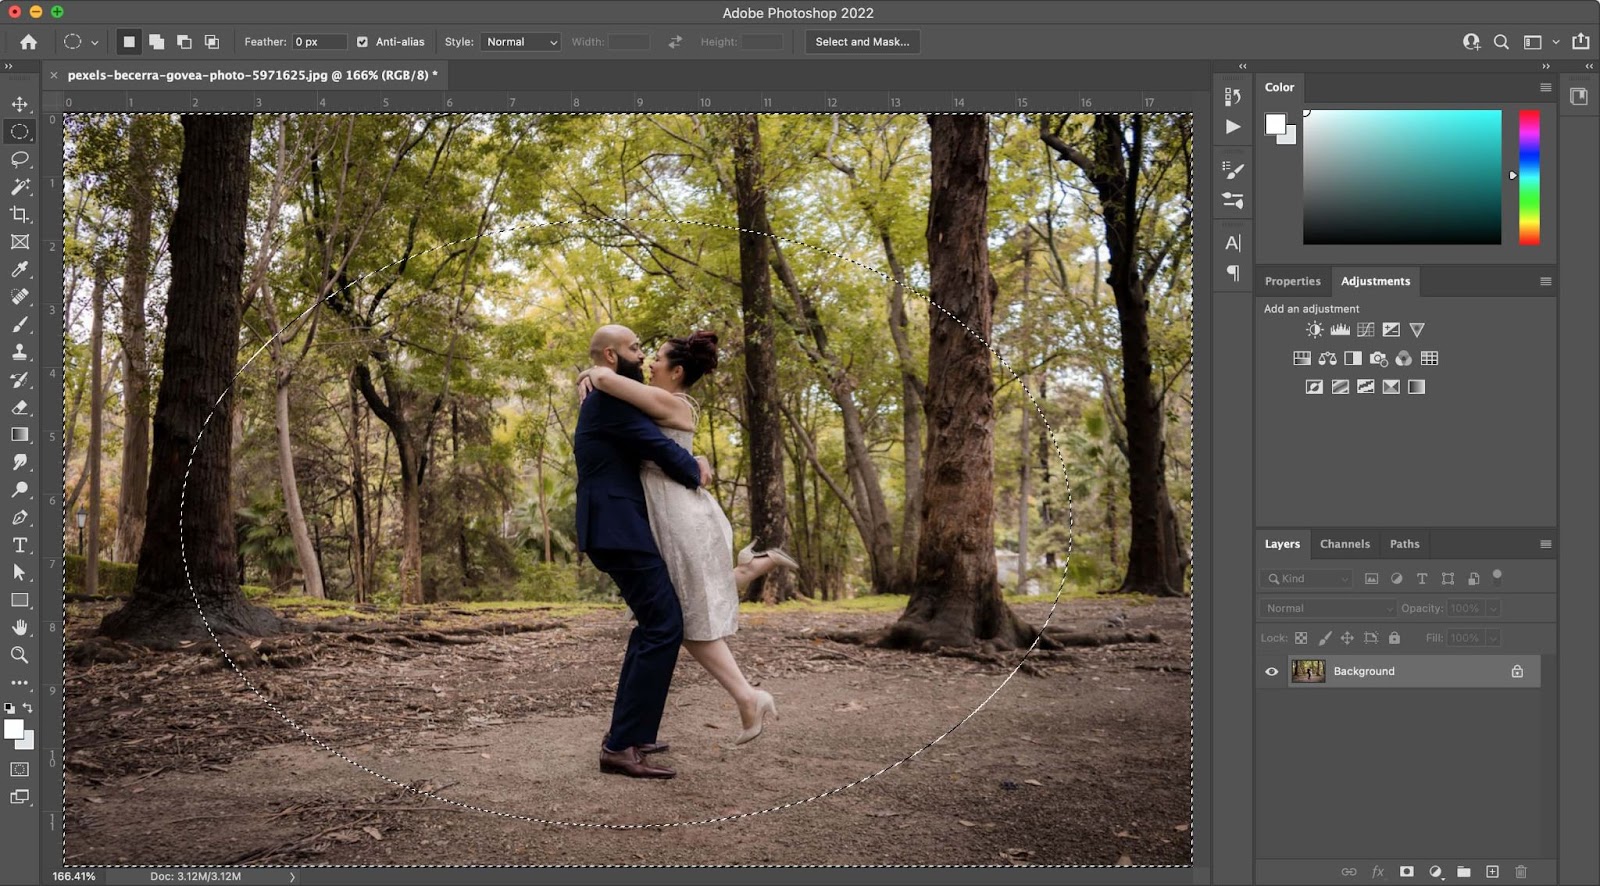
Step 3: Changed the selection
Select > Inverse volition swap the selection. For case, in the prototype in a higher place, at present the couple is non selected, but everything outside of the oval is selected instead.
Pace four: Add an aligning layer
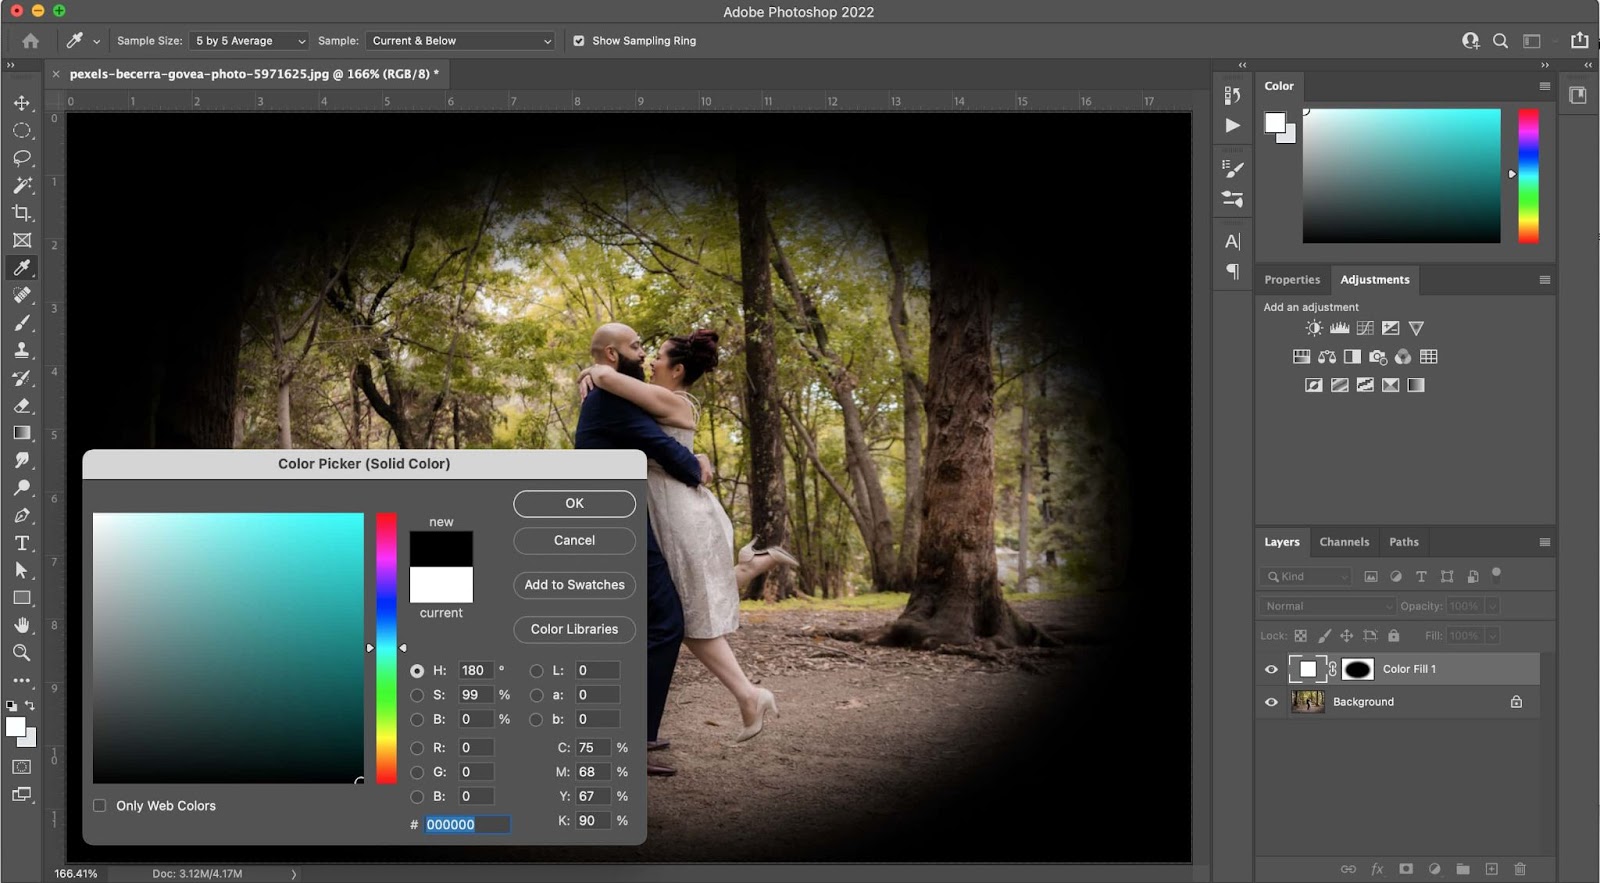
Remember, vignettes can be whatever colour, black, white, or transparent. In this step, we add together a solid color aligning layer and choose what color to make the vignette. The easiest way to add together an adjustment layer is to click on the icon at the bottom of the Layers palette and choose solid color.
When the Color Picker dialogue box appears, choose whatsoever color y'all want. Y'all tin always accommodate the opacity and layer blending mode afterward.
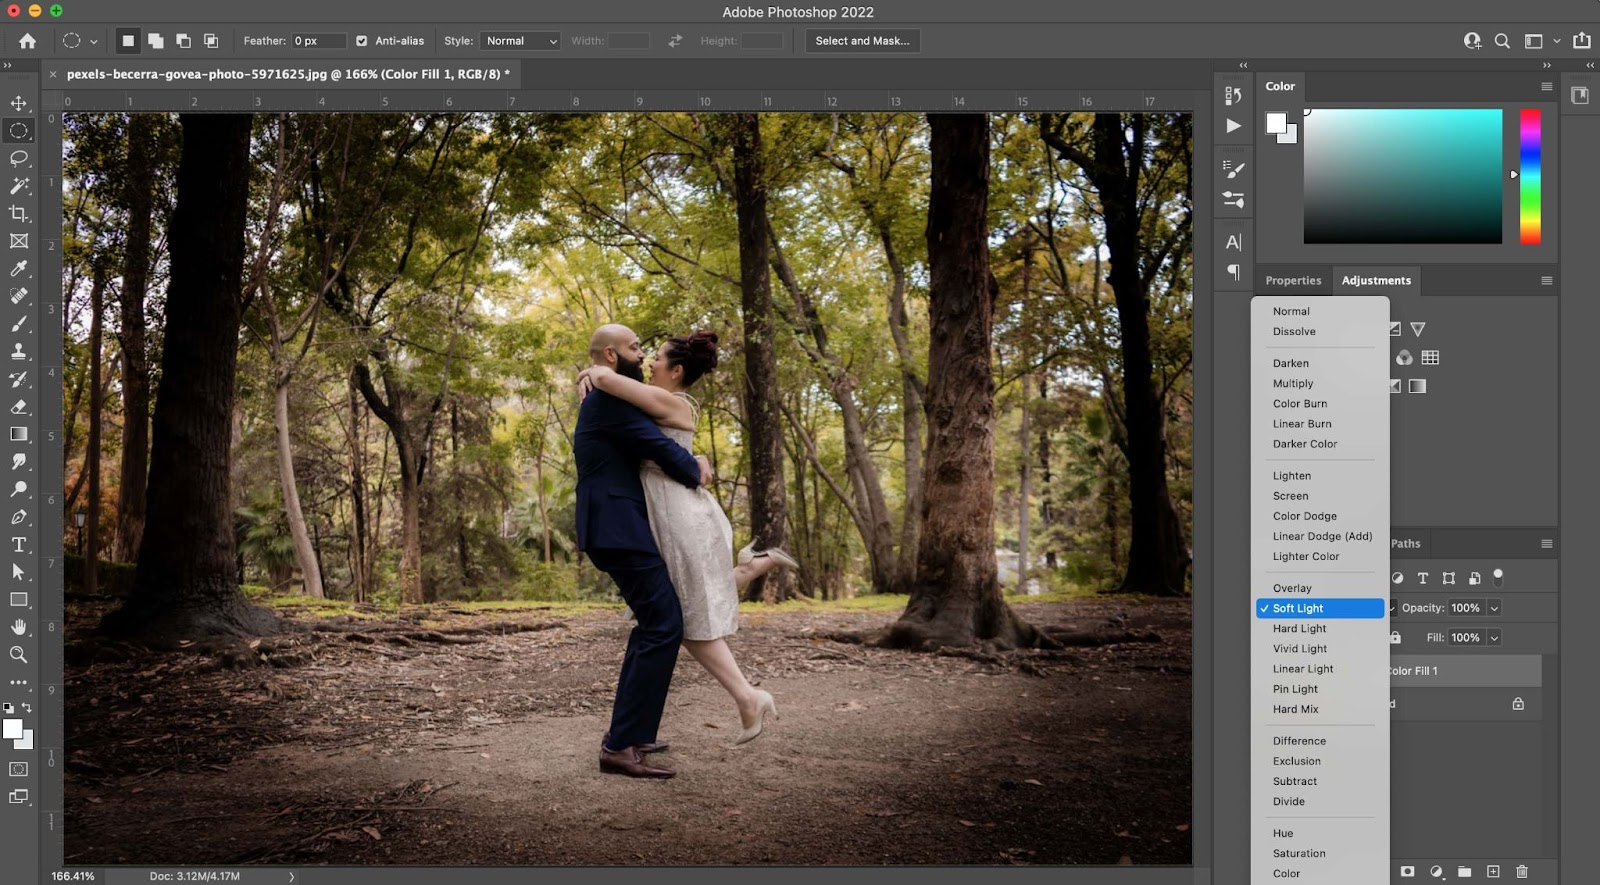
Footstep v: Adjust layer blending fashion
While y'all practise run into some people using solid colour vignettes, information technology is a scrap old-fashioned to employ them in that mode. Y'all'll notice that today photographers and editors tend to utilize vignettes in a more subtle mode. You tin achieve the aforementioned outcome — leading the viewer's eye toward the subject — without being too obvious or tacky.
Make your vignette more subtle by either lowering its opacity, changing the blending mode of the layer, or a combination of both. The blending manner can be found in your Layers palette. In this example, I decided on Soft Light equally the best-looking blending way.
Smoothing edges of isolated objects in Photoshop
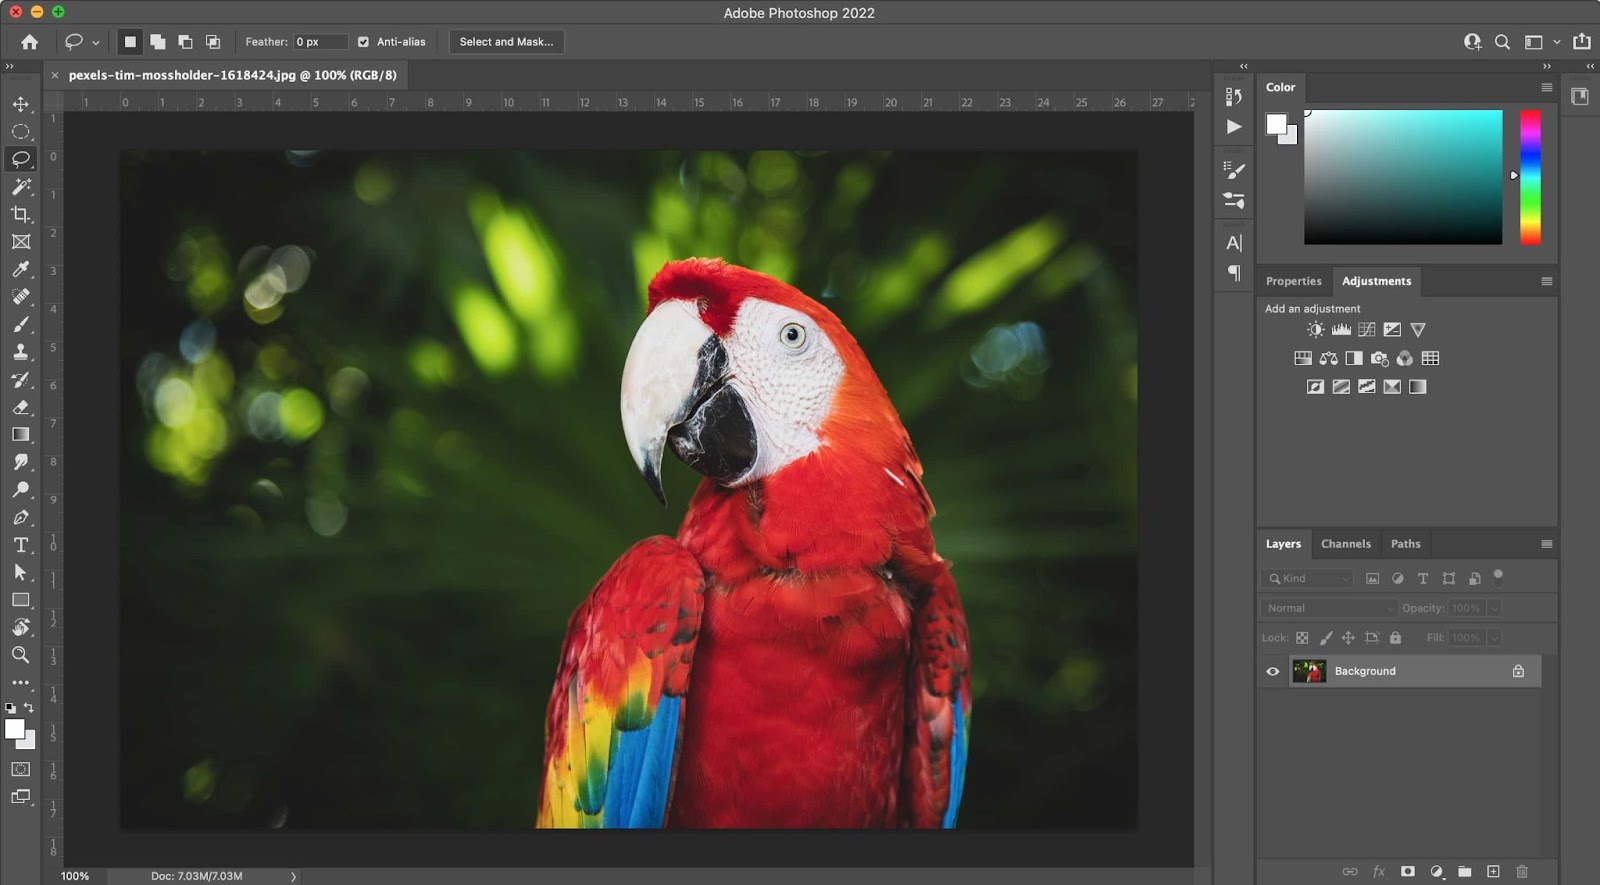
If you're using Photoshop to isolate an object in your image, either to remove the background, alter the groundwork, or place the object onto another image equally role of a composite, then try this technique. The event will be a more natural selection, with smooth edges that alloy into the groundwork.
Techniques for making your selection
Just like we mentioned to a higher place, there are then many different means to attain the same result when it comes to Photoshop. That's peculiarly true when it comes to selecting an object. You can use the quick and easy Magic Wand tool, the Lasso, or the Pen Tool. You can create a layer and mask off everything just the object you want to be selected. Or, you tin can use Photoshop's game-changing Subject Select tool that works surprisingly well.
For this tutorial, I'll utilize Select and Mask to select an object from one photo and place information technology on a unlike groundwork.
Step 1: Select and Mask
With either the Magic Wand or Lasso tool selected, click "Select and Mask" at the top of your window. (Alternatively, you lot tin can cull Select > Select and Mask)
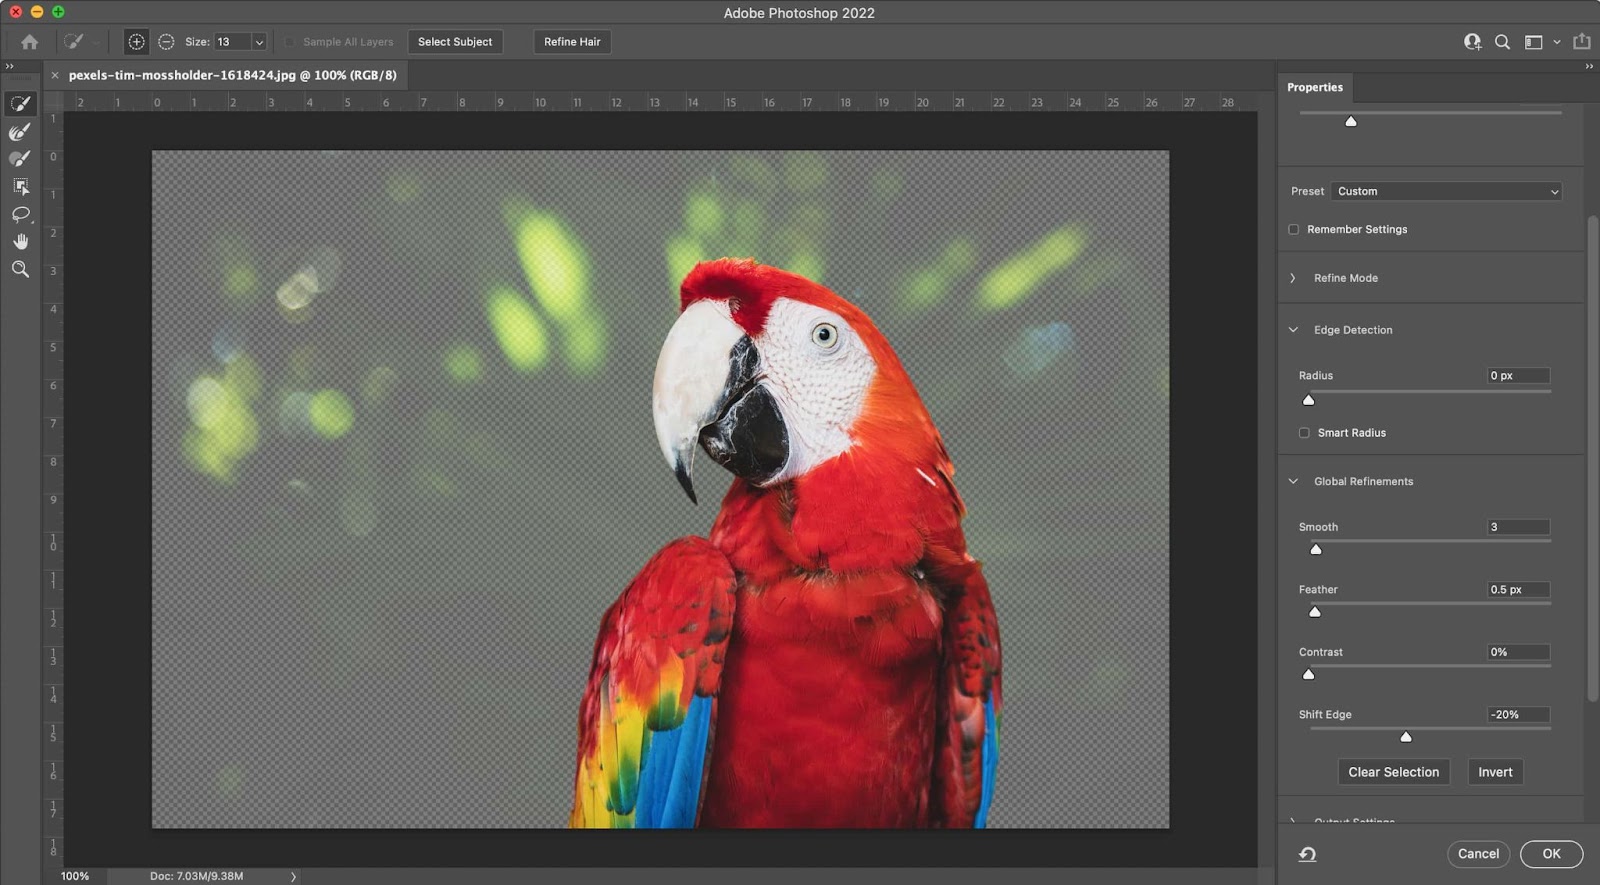
From there, adjust the Global Refinements console on the right-hand side. Here are some suggestions to first with.
- Smooth: 3 This rounds over any rough or jagged edges, smoothing out the selection.
- Feather: 0.5px The softens or blurs the edge of your choice.
- Contrast: 0 This is used for inorganic shapes that need help with the transition.
- Shift Edge: -xx% This adjusts the boundary of the pick slightly
And then, click "Select Subject field" at the height of the window and watch what happens!
Stride two: Use the Refine Edge Castor Tool (optional)
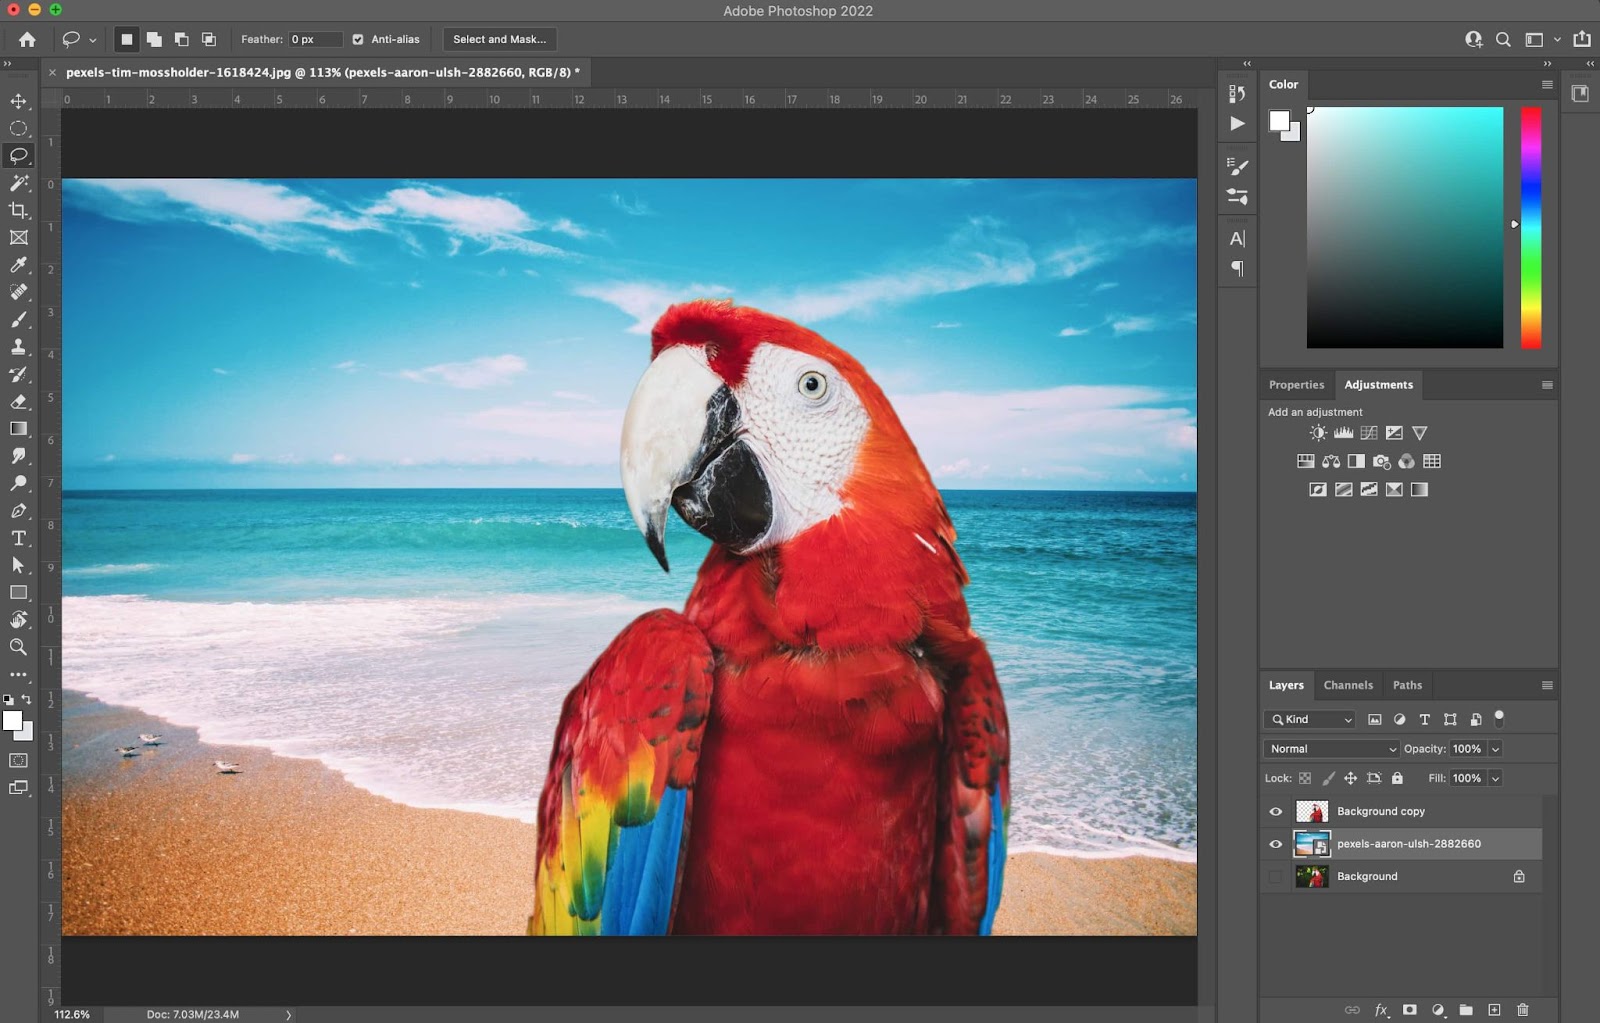
Often, Step 1 is all you demand. Just, if you're working with a complex object, similar a furry animate being or a parrot with lots of tiny feathers on elevation of his head, for instance, you may notice that you lot need a bit more than help.
That's where the Refine Edge Brush Tool comes in. Some say it's the closest thing to actual magic we have in existent life! Step 1 did a great task, but as you can see, I just need to clean up a little flake of the fine feathers effectually the parrot's beak because the light-green background was coming through with the feathers.
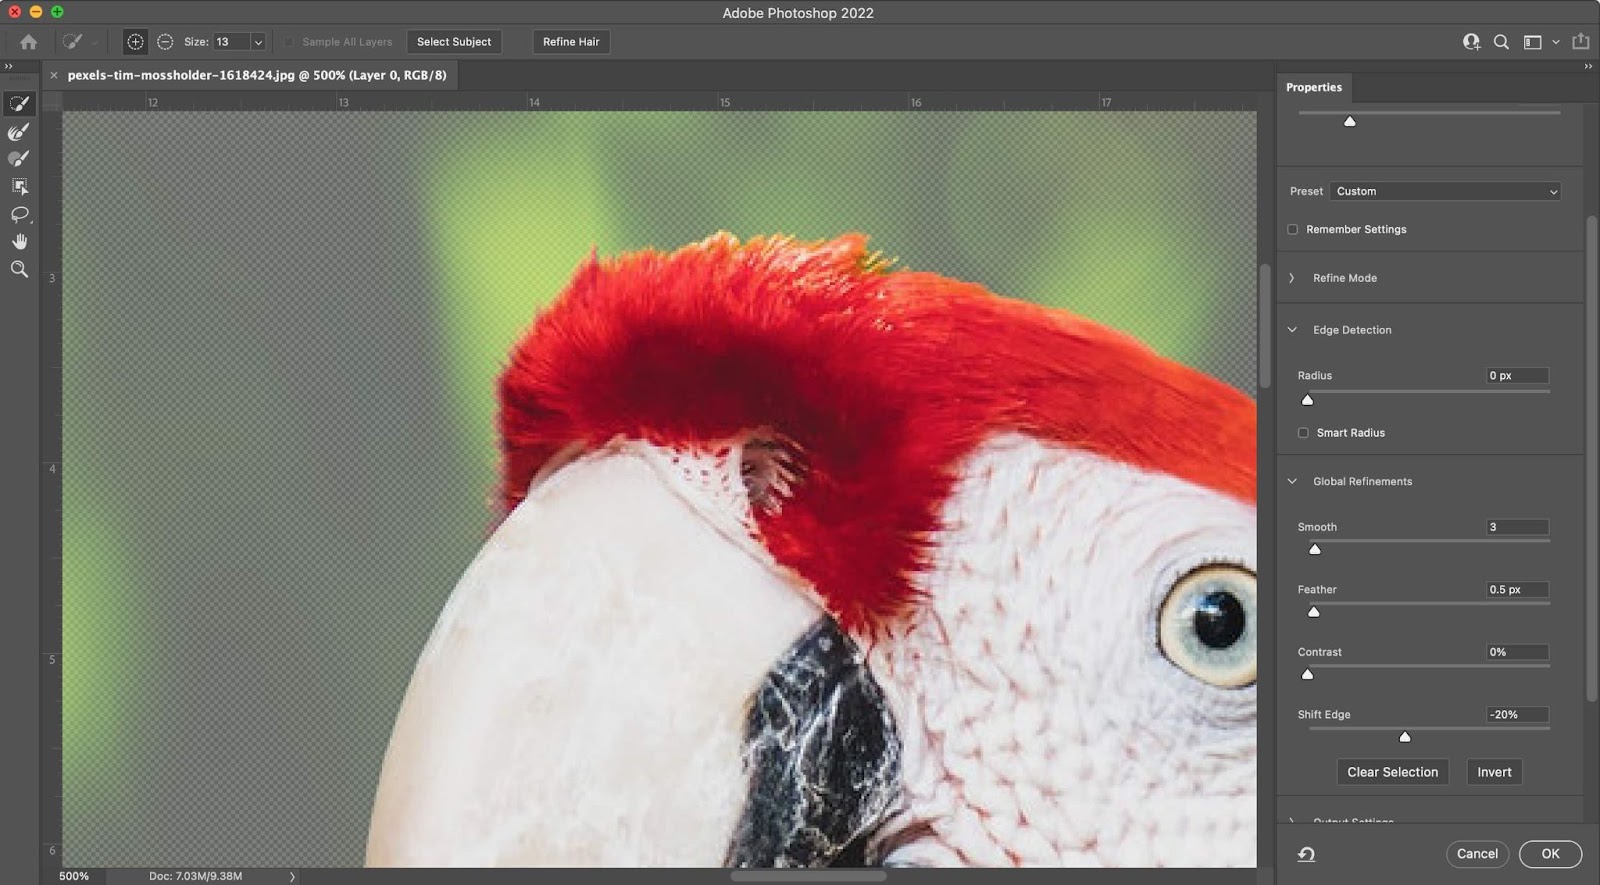
To utilise this tool, only select the Refine Border Brush Tool on the toolbar on the left-mitt side. Suit the radius (I chose a radius of 13px) and and so brush along the edge of the subject where the choice needs to be refined. Yous volition run into the selection adjustments happening in existent-time. I chose Color Aware as the Refine Way, and so it would keep the crimson feathers and eliminate anything that wasn't red. This technique works really well with fur and hair.
When you're happy with the field of study selection, click OK to render to your workspace. Then, you'll be able to select the inverse, delete the background, and replace the background as shown below.
Summary
There you take information technology! Using the tips and tools you lot've learned in this guide, you lot should exist able to smooth the edges of any image in Photoshop. You can utilize these techniques to create a vignette for drawing attention to the subject of your photograph. Or, use Photoshop'southward powerful Subject Select tools to isolate a subject, blur the edges and blend or feather the edges for a natural, realistic event.
Looking for more photoshop tips and tutorials? Bank check these out.
- How to Brand a Transparent Watermark west/ Photoshop, Lightroom & more than (2022)
- A Complete Guide on How to Colorize Blackness and White Photos in Photoshop
- The Best Photo Editing Software for Professional Photographers
- What is a RAW Image and Why You Should Be Shooting in RAW
Source: https://wp-modula.com/how-to-smooth-edges-in-photoshop-cc-a-step-by-step-guide-for-2022/
Posted by: ayerseurgentlem.blogspot.com
0 Response to "How To Get Rid Of Hard Edges In Photoshop"
Post a Comment